Experiments in Photoshop 2 – Photo retouching
I have used the spot removal tool in Lightroom to good effect in the past to remove or paint over small areas in a picture and found it to be pretty effective. However for large objects or areas of pictures it doesn’t seem so effective. I thought that now I have access to the full Photoshop CC product I’d try to edit a picture with problems and see how much better photoshop is.
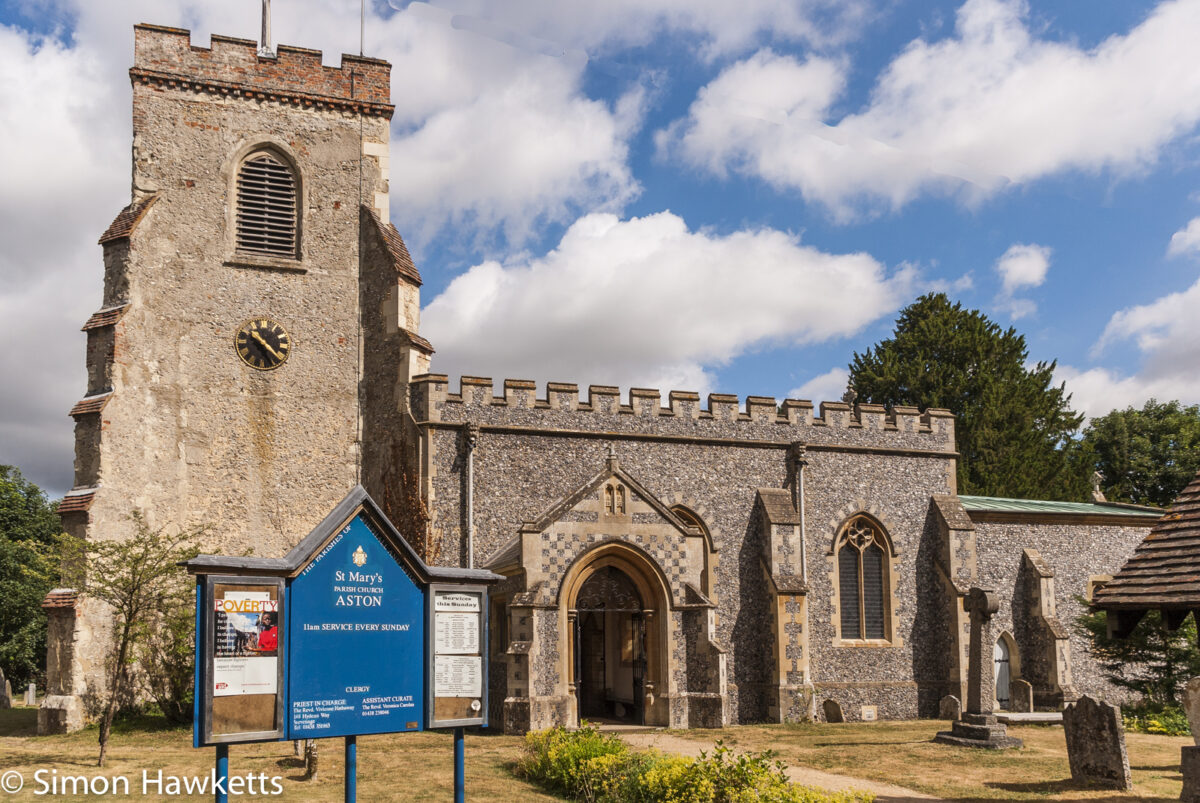
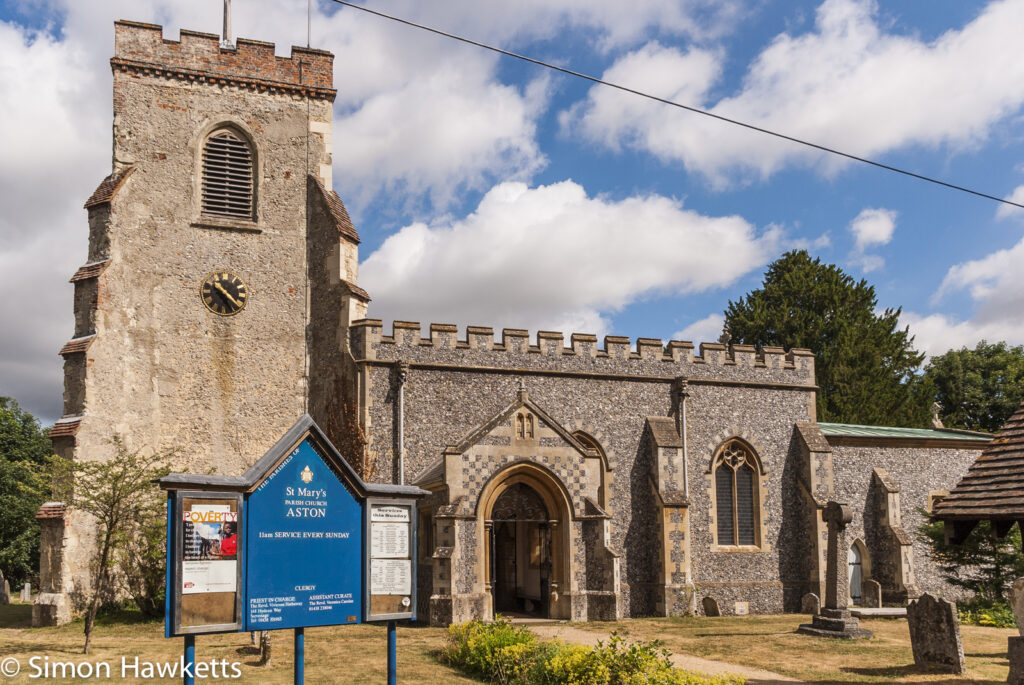
The picture above is one of St Mary’s Church in Aston, Hertfordshire which is only a couple of miles from our house. I took this picture about 3 years ago using a Pentax K200D with 18-55mm standard kit lens. Normal post processing was done in Lightroom following the same processes I always use. As a picture it is fine, but the telephone line across the top right corner is certainly distracting and I’ve tried several times to remove it with the tools I’ve had in the past.
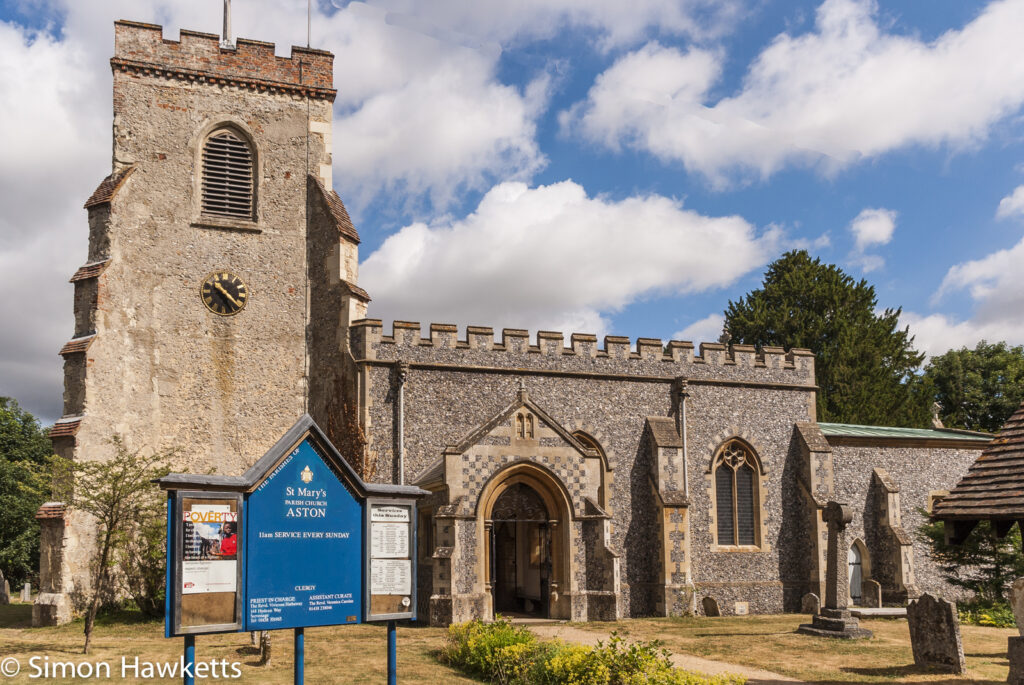
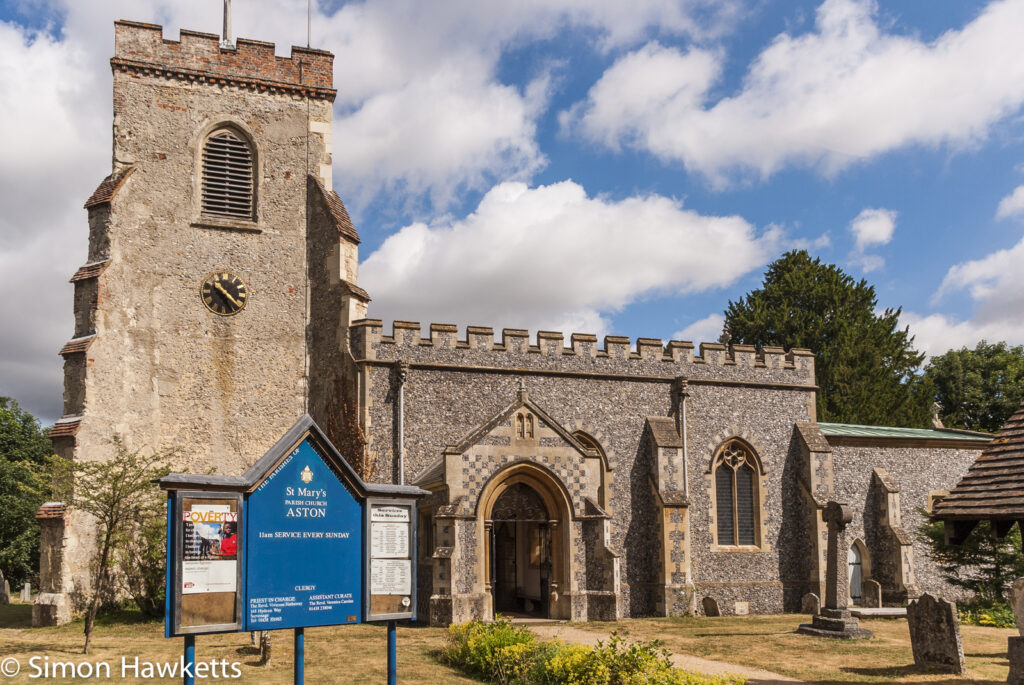
The 3 images above show the same picture with the telephone line in-place, removed using the Lightroom 5 spot removal, and removed in Photoshop CC using the Spot Healing Brush Tool. I admit that I didn’t spend a load of time in Lightroom but I think I did get the best use of the tool. I tried two techniques:
- I drew a single line repair across the picture where the line is and allowed lightroom to try to match another area of the sky to remove it.
- Individual patches drawn across different segments of the line which was more effective.
In Photoshop I did the same technique as Lightroom – namely using small painting motions to paint the line away, but the action which Photoshop takes is much more effective than Lightroom and apart from one small area it is difficult to see that there was anything removed from the picture.
I think you will agree that photoshop has made a much better job of this particular fix. To be fair to Lightroom this is not the sort of minor blemish that the spot removal tool is there for so I’m not really being critical of Lightroom. Really I’m just showing the sort of fixes which can be done easily in Photoshop which, as a Photoshop newby I’m just coming to realise.
As usual click on the photos for a better view of the images.

