How to add Simple Ajax to Advanced Custom Fields admin pages
This post is going to explain the basics of adding Ajax updates to WordPress backend, or admin page forms, when you are using Advanced Custom Fields.
Background to why I wanted to use Ajax
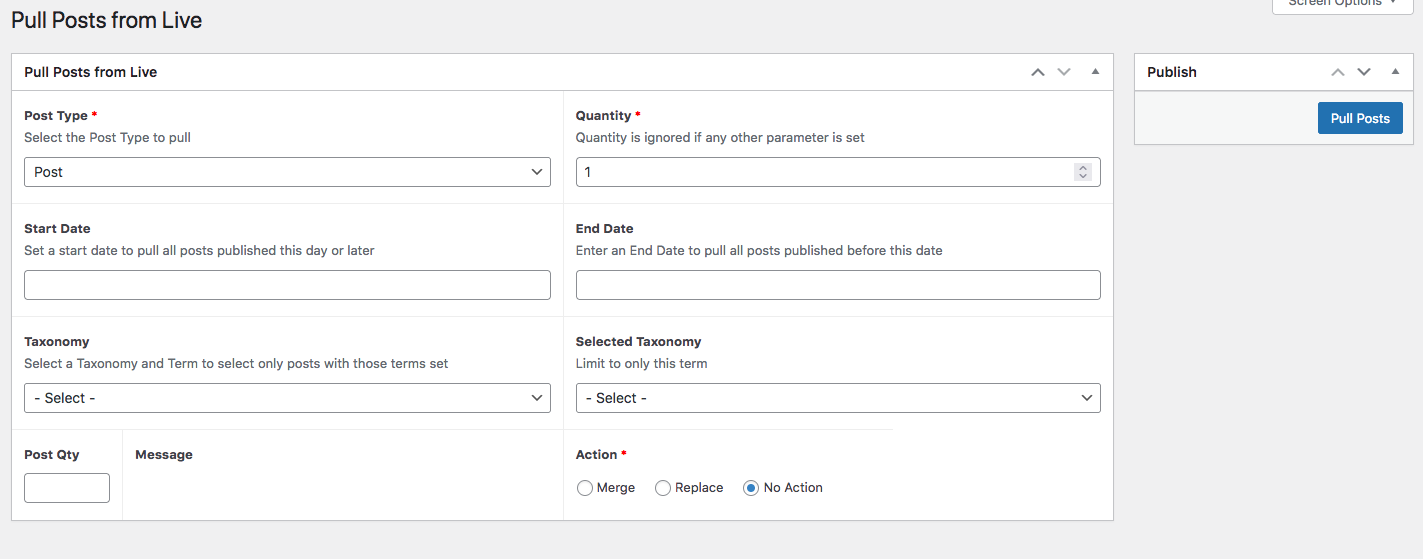
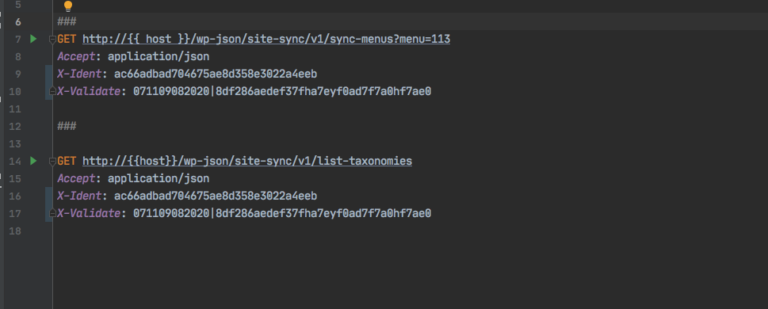
About 2 weeks ago I picked up a plugin that I’d been working on about two years ago but didn’t get round to completing at the time. It is a personal project which allows me to pull posts and taxonomies from any of the live sites I run into the development version of the site. It uses a rest api, and is pretty useful when you need to populate the development site with some real data.
One of the forms on the site allows me to define a set of condition to limit the particular set of posts I’m going to target on the live site, and on this page I wanted to do various action using Ajax – for example, when I selected a particular custom post type I want the drop-down which lists the taxonomies to update and show the relevant taxonomy list for that post type.
Although I did a lot of searching to find an example of adding this basic functionality, I couldn’t find any useful posts, so I had to piece it together myself. I also found that the ACF JavaScript documentation was pretty poor with no basic examples.
I therefore thought it might be useful to describe how I’d done it because 1) it might be useful to someone else and 2) it will help me next time I need to do it again.
An assumption made for this article is that the reader understands what Ajax is and just needs guidance on the mechanics of using it with the ACF forms.
The Basic Ajax solution
So the basic operation of this solution is to attach a listener to the Post Type select control which is triggered when the value of the control changes. This listener is going to fire off an Ajax request to the server to report back the list of taxonomies for the Post Type selected, and then when it receives back the list, use it to update another select control with the new data.
The first part of this is to get the Javascript file loaded onto the page, and this is accomplished with a WordPress ACF action:
add_action('acf/input/admin_enqueue_scripts', [$this, 'enqueue_script']);

public function enqueue_script(){
    $handle = 'site_sync_pull_post';
    $src = plugins_url() .  '/site-sync/src/js/pull_post.js';
    $depends = ['acf-input'];
    wp_register_script($handle, $src, $depends);
    wp_enqueue_script($handle);
}
This makes sure the JavaScript is loaded at the correct point in the WordPress site initialization and tells ACF where the script is located. Obviously, you need to make sure the src is set correctly for your project layout, and you may just use a function name rather than using a class method if your project doesn’t use classes.
The other parameter, ‘depends’ is to add any JavaScript libraries that your script will depend on to work, in this case I added the ‘acf-input’ library. The name of the script, or ‘handle’ can be anything appropriate for your project.
Although the code above will get the JavaScript loaded on the page, you also need to add an action to tell WordPress where to direct any Ajax requests. This is done with another WordPress action:
add_action('wp_ajax_updateTaxonomy', [$this, 'ajaxUpdateTaxonomy']);

public function ajaxUpdateTaxonomy() {
    $contentType = array_key_exists( 'content_type', $_REQUEST ) ?  $_REQUEST['content_type'] : null;

    if ( ! is_null( $contentType ) ) {
        $data = $this->taxonomyActor->getTaxForContentType( $contentType );
        wp_send_json( $data );
    }
    wp_die();
}
The general format of this action is to call it ‘wp_ajax_xxxxxxx’ where xxxxxxx is the name of the method you will call in your Ajax call. WordPress will then take care of routing the call through to the method you list in the action registration. In this case the method is called ‘updateTaxonomy’ and WordPress will route that call to the function ajaxUpdateTaxonomy.
The other important points to notice is that any data passed from the JavaScript code to the PHP function is passed in the $_REQUEST global variable, not passed into the function as a parameter. Also, the data which is sent back to the front-end is sent via a WordPress call, wp_send_json and the wp_die() call is the final exit point of the function to make sure the php process ends at that point.
The data in this case is prepared by another part of the code which is making a rest api call to the live site to find the taxonomies for the Custom Post Type and I haven’t included that code in order to simplify this article – all that needs to happen is the ajaxUpdateTaxonomy function prepares the data and returns it.
The final piece is the Javascript code which is in the pull_post.js file, which is shown below.
jQuery(document).ready(function ($) {
    if (typeof acf == 'undefined') {
        return;
    }

    if (typeof jQuery == 'undefined') {
        return;
    }

updateTax = function (e) {
        var val = $(this).val().trim();

        var data = {
            action: 'updateTaxonomy',
            content_type: val
        };
        _call(data, function (res) {
            // Populate the taxonomy select
            var listitems = '<option value=""></option>';
            $.each(res, function (key, value) {
                listitems += '<option value="' + key + '">' + value + '</option>';
            })
            $(taxonomy).append(listitems);

        }, function () {
            $(log).html("Error fetching taxonomy list for " + val)
        })

    };

 _call = function (data, callback, error) {

        acf.request = $.ajax({
            url: acf.get('ajaxurl'),
            data: acf.prepare_for_ajax(data),
            type: 'post',
            dataType: 'json',
            async: true,
            success: callback,
            error: error
        });
    }

 $(posttype).on('change', updateTax);

});
This is a simplified version of the JavaScript file to help keep this article simple – in the final version in my plugin, several of the controls have ‘on change’ handlers to update other parts of the form and show post counts etc.
At the start of the script there are some checks to make sure that the ACF and jQuery libraries are installed and then the real functionality is contained in just two functions (in fact, it could be reduced to one function, but I separated the _call function so it can be called from other parts of the script).
The updateTax function is bound to the change event with the last call in the file and when it is triggered by a change in selected value, it reads the current value of the select control and creates a data array with that value and the name of the PHP function to call as the action parameter. You will notice that all the form elements are called by shorthand names (like ‘taxonomy’ and ‘log’ and I’ll cover how they are assigned values later).
With the data assembled, the _call function is invoked and this is the call which makes the Ajax request back to the PHP function. The url to use is obtained from the acf library functions, and the data is correctly encoded to json with another acf function called prepare_for_ajax.
Once the call is completed, the callback routine is called, which in this case assembles a list of <option> values and applies them to the taxonomy select control.
Enhancements to the Ajax
A useful enhancement to the basic Ajax is to pass data from the server into the JavaScript file so it’s available during the call. I use it to pass the ACF id’s of all the form controls. I use the ‘get_field_object’ method in the ACF php library to find the id value and then pass this to the script using a call to ‘wp_add_inline_script’.
With this in place the new code to enqueue the javascript is :
add_action('acf/input/admin_enqueue_scripts', [$this, 'enqueue_script']);

public function enqueue_script(){
    $handle = 'site_sync_pull_post';
    $src = plugins_url() .  '/site-sync/src/js/pull_post.js';
    $depends = ['acf-input'];
    wp_register_script($handle, $src, $depends);
    $data = [
        'taxonomy' => $this->getFieldId('taxonomy'),
        'log' => $this->getFieldId('log')
    ];
    $phpData = 'const php_data=' . json_encode($data);
    wp_add_inline_script($handle, $phpData, 'before);

    wp_enqueue_script($handle);
}
The call to wp_add_inline_script needs to happen after the wp_register_script call, and then the data can used in the JavaScript file as a normal JavaScript variable or constant – in this case with the name php_data. So at the top of my JavaScript file I have
    var taxonomy = php_data.taxonomy;
    var log = php_data.log;
and I don’t have to update the JavaScript file if the id’s of any of the form elements change.


